Customisation Tips – Solution Management

When I first started using CRM I made plenty of mistakes that cause me to physically cringe when I reflect on them, so I hope that by sharing some tips that I’ve picked up on my journey, I may be able to help others avoid them.

I’ve been discussing customisation best practices internally in my organisation and, since I’ve been documenting them anyway, I thought it would be worth sharing my thoughts.

Use solutions

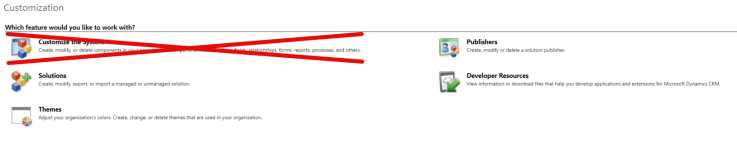
This is probably my number one tip. If you’re doing any sort of system customisation, please put it in a solution container; NEVER make changes directly to the base solution – just pretend the “Customize the System” button doesnt exist.

Ignore the Customize the System button

By using a Solution you can avoid the dreaded new_ prefix on newly created fields/entities/web resources, etc. and use your own publisher prefix.  A solution also operates as a container for all the customisations you are making to the system, which makes it significantly easier to understand what changes have been implemented for you and anyone else who may be working on your system.

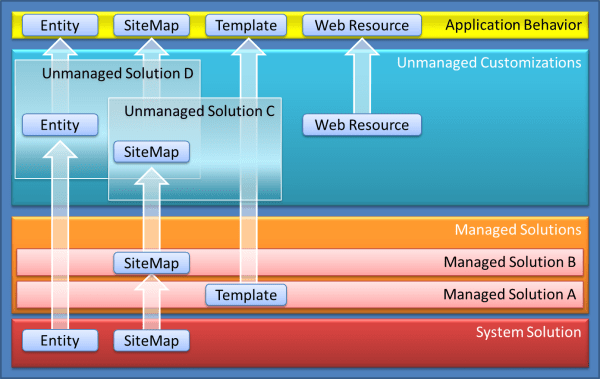
One of the biggest debates on the use of Solutions is whether you should Managed or Unmanaged. I have used both in different systems and I don’t think there is a single right answer; it all depends what is right for you in your system (though Microsoft officially recommend the use of Managed Solutions (see https://msdn.microsoft.com/en-gb/library/gg334576.aspx#BKMK_UnmanagedandManagedSolutions)

Managed or Unmanaged

There are plenty of posts by more experienced heads than I discussing the differences between the two solution types, and weighing up the pros and cons of each, so I’d recommend seeking them out for further reading.

The only real piece of advice I’d like to add is that Unmanaged Solutions are easier to manage (pun intended), and you can always convert an Unmanaged Solution to a Managed Solution in future if needs be; just be aware of the potential for unintended changes to be added to the solution by over-zealous developers during UAT or while it is live in the Production environment, leading to solution disparity.  You should weigh up the control of Managed Solutions versus the flexibility of Unmanaged Solutions in any decision-making.

Version Numbering

Aligned with the use of Solutions is to ensure you have a rigorous and consistent approach to versioning. Using version numbers makes it a lot easier to manage your solutions, and to identify issues if and when they arise.

My approach is to use the standard of Major.Minor.Release (#.##.####), as defined below:

Version Numbering

Major – this should be incremented every time you introduce some significant functionality, change the phase of the project, or if you upgrade to a new version of CRM

Minor – this should be incremented every time you release an update to the solution that introduces minor features or changes that are building on existing functionality.

Build – this should be incremented with every single release, and should cover bug fixes, etc.

There are lots of different version numbering schemes available (e.g.  Major.CRMRelease.Minor.Release, Year.Month.Day.Revision, etc.), and it doesn’t really matter which one you use –  the important thing is that you use a consistent version numbering scheme in your development, and that everyone working on your system understands the numbering scheme.  I’ve previously inherited a system developed by a Microsoft Partner who had used 4 different numbering schemes when deploying solutions which gave me no end of headaches.

Documentation

I’m sure I’m not alone in not particularly enjoying writing documentation, but also cursing out any other developers who dare to release a solution without documentation.  As important as it is to develop system updates, writing appropriate documentation is equally important.  I’m not suggesting that you include War & Peace with your releases, but adding a few notes on the release history to the solution description field will go a long way to helping both future you, and anyone else who may be working on your system

Release Notes

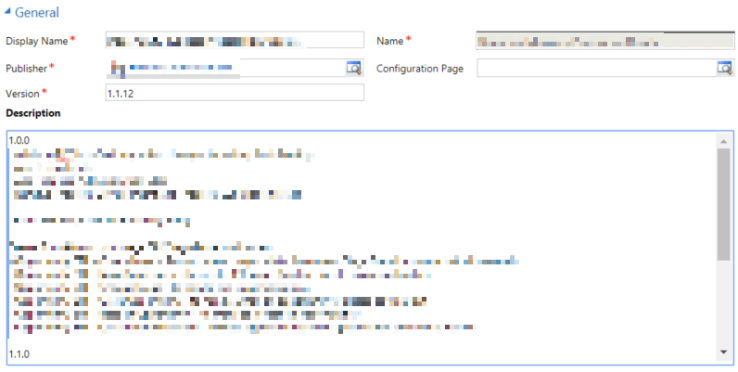
Having these little notes provides a perfect aide-mémoire when you come back to work on the solution in six months time, and taking the two minutes to do it now will save you hours down the line.  I like to keep a more detailed release note history to go with my solutions too; for a great example of detailed release notes you could look at ClickDimensions.

Quick Tip: To make your life a lot easier when writing release notes, the MetaData Document Generator plugin for the XRMToolBox is a lifesaver

My next post will outline my tips related to new entities, fields, views, etc.

Advanced Multiselect for Dynamics – Review

Following on from my last post about Multi Select Checkboxes, I have been continuing research to try and find a suitable solution for adding multiselect options to my CRM 2016 environment.  I really like the checkbox tiles, but the downside to them is the need to create fields, update forms and update web resource parameters when they need to change, which creates more work for the administrator.  I was therefore looking for a solution with less administrative overhead for situations in which the list is likely to change more often, as well as to offer additional user experience benefits.

My search led me to the Advanced Multiselect for Dynamics solution by Pavel Khorozhansky.  This solution is built on the use of N:N relationships, and allows for quick associate/dissociate of records.  In Pavel’s own words:

You most likely are interested in this solution if:

  • you have Many-To-Many (N:N) relationships and would like to associate / disassociate related records in a quick, convenient and flexible way using a set of appropriate checkboxes on a form
  • you are using either Dynamics CRM 2016 Update 1 (8.1) or Dynamics 365 (8.2) version and you would like to have multi select / multicheckbox functionality on a form and don’t want to create a lot of dedicated checkbox attributes for each an option
  • you are using the new version of Dynamics 365 (9.0) (where a new multi-select functionality introduced out-of-box) and find this out-of-box feature does not suit your needs (for example, you have to make changes in metadata each time you need to add/remove list options (instead of giving some users an ability to easily maintain the lists), you cannot support ‘obsolete’ options, and so forth).

There is an extensive wiki on the GitHub repository covering installation and configuration, so I won’t repeat it here.  I found it incredibly easy to install and get using following the instructions, so I’m sure anyone else will too

What I like

Easy Installation

The solution is really easy to install, and the configuration wizard that Pavel has built into the solution makes it really easy to get up and running.  It is worth noting that there is a small element of the solution which would be considered unsupported, so this should be borne in mind if you wish to install this solution in your production environment.

Better User Experience

The solution works with any custom N:N relationship, including self-referential relationships, and it is significant improvement to the User Experience when associating records.  With the out-of-the-box approach using sub-grids there are up to six steps to follow to associate a record:

Add records to Sub-grid

In comparison, with the Advanced Multiselect solution it’s simply a case of selecting the appropriate records from the available list:

Advanced Multiselect

From a User Experience point of view, this is a much more efficient and elegant solution.; it minimises the amount of mouse clicks that are required and makes it really easy to train new users.

I also like that it shows the unselected records, so that system users are provided with a visual reference to decide if perhaps one of the unselected choices could also be selected.

Multiple Selection Types

With the solution you get the options of a few different types of selectors.  You can select from one, two, three or four columns of checkboxes, which look as you’d expect:

two_columns

Where I think the solution excels however is in the following two options:

One Column with custom descriptions, which is a great way to add context to the options.  I like the ability to add a custom description and can envisage numerous advantages to this solution

One_Column_with_descriptions

Selectize, which works kind of like a Tagging option. This is particularly useful if you have a large list of options:

Selectize

There is also the possibility to create your own template styles, if you’re familiar with HTML/CSS and knockout.js or selectize.js.  This add a massive amount of extensibility to the solution.

Conclusion

Overall I would say Advanced Multiselect for Dynamics is an excellent solution, and a very handy addition to my toolbox of solutions.  I have barely scratched the surface of the solution with this review, but I believe it will help deliver improvements to the user interface in your CRM system and therefore make the user experience more enjoyable.  I’ve demoed the solution to selected users in my organisation and the response has been overwhelmingly positive.

Clone a Record with a Notification Message

Trying to find the right words for a title to convey succinctly what I am trying to say is not my strong suit…

Within my organisation we occasionally have the need to create repeating records on an annual (or more frequent) basis, e.g. SWOT Analysis, Anti-Money Laundering checks, etc.  In order to preserve the original record we will lock it after a certain period of time to prevent changes being made, and therefore encourage the users to create a new record instead to record any updates.

To make it as easy as possible for the users to maintain the records, we wanted to add a simple notification to the record with an option to Clone the existing record.

SWOT Clone

The functionality above was really easy to implement using the Notify.js solution created by Paul Nieuwelaar of Magnetism Solutions Limited. (Incidentally, Paul also created the Process.js and Alert.js solutions which I would also highly recommend).

Paul’s documentation is really clear, so even a coding novice like me could put it to use really quickly.  In order to add the Clone function, I found a script posted by Neeraj Agrawal on the Dynamics 365 blogs; the script uses entity mappings from a 1:N entity relationship to make cloning the record simple.

All that was left to do was to combine the code and add it to my form.  The code I used is below (though please excuse the wordpress formatting!):


function addLockedNotification()
{
var daysSinceCreation = Xrm.Page.getAttribute("hr_dayssincecreation").getValue();
var recordStatus = Xrm.Page.getAttribute("statecode").getValue();

if (recordStatus == 1){Notify.remove("locked");}

else if (daysSinceCreation > 5)
{
Notify.add ("This record is locked. To update the SWOT Analysis, please Clone this Record", 
"INFO", 
"locked", 
[ 
{type: "button", text: "Create Clone", callback: function clone() {
var entityId = Xrm.Page.data.entity.getId();
var entityName = Xrm.Page.data.entity.getEntityName();
var clone_params = {};
var options = { openInNewWindow: true }; // to open record in new window
clone_params["hr_previousswotanalysis"] = entityId 
clone_params["_CreateFromId"] = entityId;
clone_params["_CreateFromType"] = Xrm.Page.context.getQueryStringParameters().etc;
Xrm.Utility.openEntityForm(entityName, null, clone_params, options);
} 
}, 
{type: "link", text: "Not now", callback: function () {Notify.remove("locked");}}
]
);
}
}
}

As you’d expect with code from a random blog on the internet, no warranty is expressed or implied, use at your own risk, etc.

Multi Select Checkboxes

For as long as I have been using Dynamics CRM, users have been asking for Multi-select checkboxes.  I know that they are now available in Dynamics 365 but for those of us on the earlier versions, they are still frustratingly difficult to achieve.

The best solution I have found for this problem, to date, has been to add two-option fields to the entity, and then ensure the control formatting is set to checkbox, which leads to a Form section that looks a little bit like this:

This solution works pretty well, for the most part, but visually I don’t think it’s anything special so I decided to consult my friend Google to see what other options people have developed.

XRM.Multiselect

My searching led me to XRM.Multiselect by Ambrozy Rybicki.  This is a great solution built on Knockout.js (i’m pretending I know what that means) which allows you to create clickable “tile” buttons for your two-option fields, and load them into your form in a web resource.

V1.1.0.0 of XRM.Multiselect allowed you to add a set of tiles to your form that looked like the example below:

I loved this solution, and it’s super easy to install following the manual on Ambrozy’s website.  One of my favourite things about this solution is how easy it is to modify the CSS file to create your own incredible looking tiles.

Within my environment, I wanted bigger tiles, with Hover effects, so that the tiles changed as you moused over them, and this was really easy to add:

For my example, hovering over a field causes it to become white with a coloured outline (grey for unclicked fields, blue for clicked fields), as you can see in the HR field above.

I also like the ability to add different highlight colours for Business Recommended (Orange Underline) and Business Required (Red Underline), as it is so much more visually striking than the blue + or red * that come out of the box.


Preventing Users from updating locked fields

As I was experimenting with this solution, I wondered if it would be possible to restrict access to click the buttons if a field was read-only/locked.  I am not a coder by background and my grasp on JavaScript is limited so this was a bit of a challenge for me.

My first port of call was the SDK to see if there were any controls or attributes that would let me know if a field had been disabled, and lo and behold, you can use the getDisabled() control to return a Boolean value to determine if a field has been locked.

I got very excited at learning this, though it still took me a while to work out how to use it properly.  After a bit of trial and error I was able to add this to the JS library for XRM.multiselect and now if a field is locked (either set as read-only, or locked by JS/business rules) then you can add styling to avoid it being updated by Users:

The Trustee tile in the image above has been locked and, by adding “pointer-events: none;” to the CSS style sheet, it is not possible for Users to update the field.  Ambrozy has very kindly merged my fork with his repository and it is now available for download.


Using Field Security to lock fields from Users

After achieving the ability to lock disabled fields in the web resource my mind was abuzz and I thought about what other functionality I would like to see in this solution.  We make use of field security in my organisation, and I was concerned about the user experience if they tried to click fields that they weren’t able to.

While the JS won’t overcome the Field Security, this is not obvious to a User and I think it leads to confusion.  Of course, you could just avoid adding a field with Field Security to the web resource, but where’s the fun in that?

To figure out this problem, off I went back to the SDK to see what attributes covered Field Security.  With a bit of google-fu I figured out the getUserPrivilege() could be used to return a Boolean value if a User was able to update a field or not.

A bit more fiddling with the JavaScript assembly allowed me to add the ability to set a class for Secured fields, and a CSS update allowed me to add a different bit of styling to the form:

Conclusions/Next Steps

I think XRM.Multiselect is an excellent tool that adds a bit of real visual flair to CRM forms and enhances the user experience greatly.  Ambrozy has done a great job developing the solution, and his coding made it really straightforward for someone as inexperienced as me to develop a couple of updates that I hope provide useful additional functionality.

I plan on refining the functionality for field security to ensure the styling works as intended then I’ll update GitHub with it so that other people can hopefully make use of it.  I’m constantly amazed at the ingenuity and generosity of the CRM community who develop solutions that make my life so much easier, so I hope that this goes a very small way back to repaying them.

In terms of next steps, I’d like to explore some additional styling options to make it possible to add multiple button types to a form, so any ideas/recommendations are welcomed.


Adding a missing column to an Excel Template

Have you ever created an Excel Template, with all of the necessary edits, pivot tables, charts, etc. that you need to report, only to realise the first time you use it that it’s missing a vital column of data from CRM?  Typically, this means you have to redo all the work you did originally to include the missing column, wasting valuable time and energy.  One of my connections on LinkedIn posted this exact problem yesterday, and it got me thinking, surely there must be an easier way to solve this?

I think I’ve found a way!

Step 1 – Download your existing template

I’m sure if you’re reading this, then you know how to do this already, but if not, then navigate to the entity and view you’re going to be building the template from, then on the command ribbon click on Excel Templates, then find the specific template you want to use, and finally download it to Excel (note: don’t open it in Excel Online).

Step 2 – Realise you’ve missed the column you need

In my example, I’ve downloaded the template and opened it only to realise I’ve not included a column with the Created On date for the records.

Step 3 – Work out how the template is built

At this point, rather than downloading a new template and building my data analysis all over again, I thought I’d see if we could edit it in Excel.  I couldn’t see any hidden sheets, so I figured I’d see if there were any very hidden sheets.  I opened the VBA Editor (by pressing Alt+F11), and sure enough there was a sheet called hiddenDataSheet with a visibility property of 2 – xlSheetVeryHidden.  To open this sheet it was just a case of changing the visibility setting to -1 – xlSheetVisible

Step 4 – See what’s included in the Hidden Sheet

I opened the sheet I’ve now made visible, called hiddenSheet appropriately enough, and I could see a string of text in cell A1.  A quick look at this shows that it contains a string of references between CRM and the data table.  This was my eureka moment where I figured this might work!

Step 5 – Add missing column to the data table

As I mentioned above, I wanted to add the Created On date to my table, so I created a new column called Created On (clever, huh?), and formatted it as a Date field (pro tip, add data validation rules to the column to ensure it matches the standard templates)

Step 6 – Add a reference to the new column in the hiddenSheet

To update your hidden sheet to populate your new column with CRM data, you need to amend the string in hiddenSheet.  To the end of the string, add

&[your field reference]=[your column name]

replace [your field reference] with the logical name of the field you’re referring to in CRM (i.e. createdon for the Created On date)

replace [your column name] with the name of the new column you added to the data sheet.  Ensure you include capital letters where you have them in the new sheet, and replace all spaces with the URL encoding reference %20.

Thus, for my new Created On column, I added “&createdon=Created%20On”

Final Step – Add new Template to CRM

Package up your amended template, re-hide the hiddenSheet, then save it and upload to CRM.  Et voila, your new template should work!


Notes:

I’ve tested this with a few templates and it seems to work for me, no warranty is express or implied, use at your own risk, etc.

If you need to include a reference from a related entity, then you’ll need to include the GUID in the field reference and structure it as guid.logicalname


Hope this helps!